Table of Contents
New Game
Preparations for NG
If you are not using a new profile, you must do the following before the run
- Fire all shotgun shells that remain for your shotgun
- Head to the Repository and unequip everything in the Change Equipment menu.
- Destroy all of your equipment (clothes and weapons), or else never use them during the run.
- Delete everything from Manage Possessions and Stored Item List.
- Use all gear (fences, med spray, etc.) or else never use the extra during the run.
- You cannot craft gear or construct base elements before you are supposed to gain them during the game. For example, crafting iron fence before Chapter 2.
- When you craft a recipe make sure you've first obtained it from its respective container during the run.
- You are not allowed to open recycled weapon or material cases from containers that once had recipes.
- Any loose resources found in containers can be used.
If you are destroying stuff at Africa FOB, make sure to place fences outside of the FOB so your resources can be updated from the autosave.
To make the Exploration Team Ready Room, you need the following
- 8 Iron
- 5 Wood
- 10 Nails
To make the Base Camp Expansion, you need the following
- 30 Iron
- 10 Screws
To make the Archaea Blade Trap, you need the following
- 200,000 Kuban Energy
- 4 Sensor Unit
- 8 Electronic Circuit
- 8 Titanium Alloy
- 16 Concrete
- 32 Steel
- 1 Battery
Weapons
Durability and how it affects weapon damage, Pipe Spear as an example via SpaceCow's testing
- 100 - 70% - 80 damage
- 69% - 50% - 72 damage (10% decrease)
- 49% - 30% - 56 damage (30% decrease)
- 29% - 1% - 24 damage (70% decrease)
- 0% - 8 damage (90% decrease)
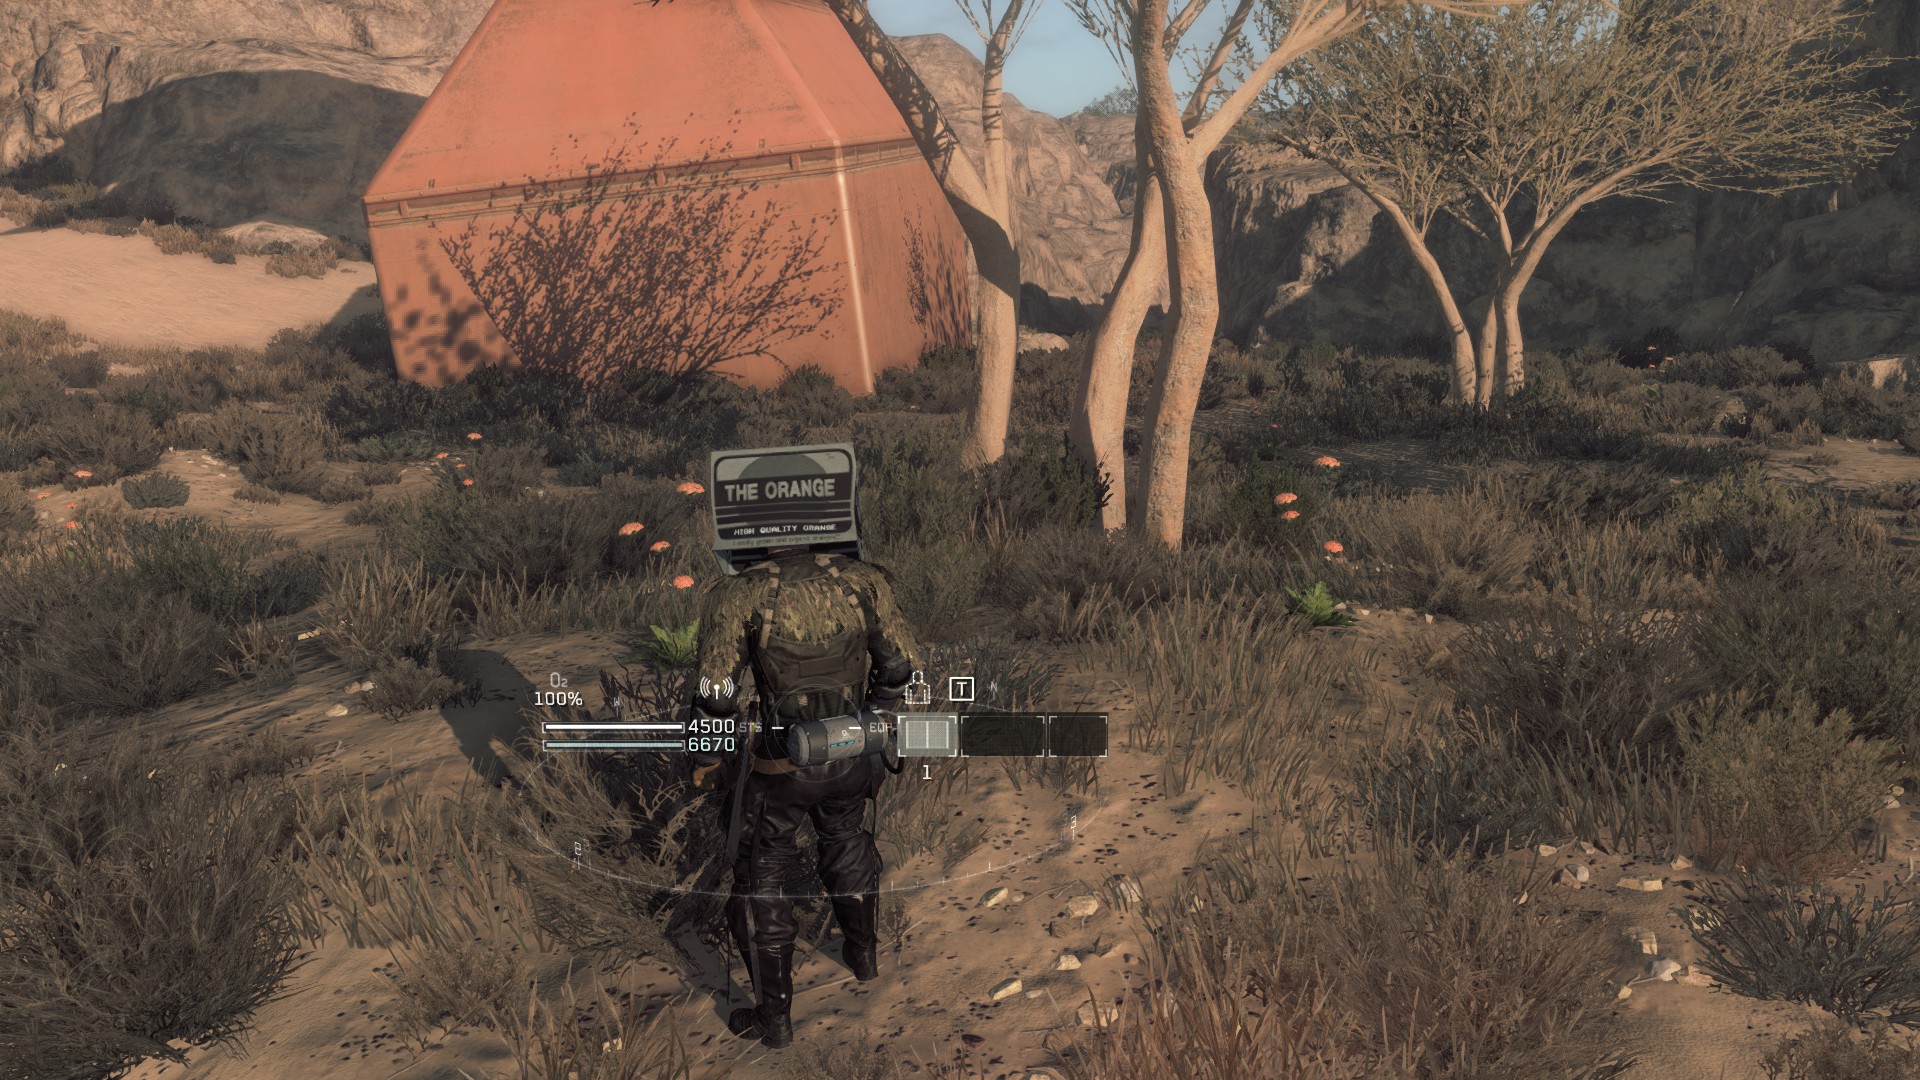
- Additional damage will occur if the targeting icon is the orange diamond. Research data can be found here by SpaceCow
- With spears, if you attack through an iron fence you will double the durability when attacking an enemy. Limit this as much as possible to keep your durability high.
Knife
- You always have the knife no matter what.
- Knife can only be used for backstabs.
- Knife has infinite durability!
- Unless an enemy is a red skull (high level), a backstab will one hit kill any enemy, including Mortars and Bombers.
- If an enemy is a red skull, 2 backstabs will kill, or a backstab with a few melee hits.
- Knife is great for isolated enemies, special enemies and to save on durability.
- Backstabbing when aggro'd enemies are nearby is dangerous!
Pipe Spear, Survival Spear & Bayonet Spear
- Pipe Spear can potentially be the only spear you use throughout the whole run, but you can pick up stronger spears later on. Pipe Spear does not require energy to create, repair or upgrade!
- Survival Spear is in container 06, which you can pick up driving to the Wormhole digger.
- Bayonet Spear is picked up during Fallen Village defense, but requires picking up chromium.
Spears are fantastic for a few reasons:
- You are required to make a pipe spear to progress
- Due to their range, you can keep distance between you and the target
- Spears can pierce multiple targets
- Spears can attack through iron fence, though this adds a durability loss (1 for the fence, 1 for the enemy hit)
- Due to the durability loss from attacking through a fence, try to attack parallel to the fence when a group is on it.
Rusted Machete
- Machete is your secondary melee weapon. The fully upgraded machete does similar damage to the pipe spear.
- The machete attacks in an arc, unlike the spear's linear attack.
- Use the machete for taking out grounded enemies and destroying boxes and barrels for their resources.
- If you can get behind a wave of distracted enemies, you can arc the attack at their heads.
RASP
- Must be picked up in Container 04 by the Jeep in the locked gate area. Do this when driving to Chris.
- Sidearm Shotgun with 2 in the chamber, 8 in the clip. Build 2 for more ammo to access.
- The RASP will be used for Africa, particularly for Seth and special units.
- You will want around 20 shells during the run. Upgrading the RASP isn't necessary.
Gear, Equipment, and Gadgets
- You will not pick up any extra armor during the run, but you can repair your armor at the dig to Africa, Chapter 15-1. Grab a tire and some cotton to repair your gear.
- You will not be overweight at any point during the run, so keep your clothes on!
- No Survival Equipment will be picked up during the run.
- Medical Supplies and Empty Bottles can be kept even when returning to base camp via the menu.
- The most valuable medical supplies are Styptic Kits and Taping Kits. Bandages and Poultices are less important. Antibacterial is only relevant if you drink dirty water while out in the field.
- Iron Fences combined with Wooden Fences will cover you defensively.
- 2 Lures are required for Africa
- Med Spray must be picked up at Container 03 at Transporter 02, Chapter 04.
- There are 9 fairly convenient Golden Crescent to pick up during the run, meaning at max you'll need 18 aluminum for Med Spray. Med Spray is a full heal, which is extremely useful when you are bleeding and cannot naturally heal. First place aluminum is accessible is Wrecked Base, meaning you can craft after Chris.
- 1 Sandbag Foothold is required for the Ruins 03 skip, more can be crafted for defense. Sandbag Foothold is the strongest defensive gadget you have access to by default.
- Grenades are key during Africa for Sahelanthropus (Sally) defense, Seth, and Abandoned Mine. At bare minimum 6 grenades should be crafted, 12 is better, 18 is safe.
| Gadget | Resources Required |
|---|---|
| Normal Fences | 6 Iron |
| Lures | 1 Bottle (Empty) |
| Wooden Fences | 6 Wood, 3 Nails |
| Med Sprays | 2 Aluminum, 1 Golden Crescent |
| Sandbag Footholds | 14 Clay, 4 Wood, 4 Nails, 6 Gunny Sacks |
| Grenades | 3 TNT, 1 Spring, 5 Iron |
Enemies
Parenthetical names are based off game file names, found by Discranola, text here
- Whenever enemies attack you, they have a chance to cause several status ailments. You'll know you gained a status ailment by Captain screaming and the cross icon.
- Bleeding stops natural health recovery, blood streams down HUD, worst status effect second to Sprain.
- Laceration lowers total HP.
- Bruised lowers total Stamina.
- Sprain forces Captain into a disabled state with limited movement, lasts one minute, and turns into Bruised afterwards. If you get sprained during combat, chances are you will die. Only grounded Wanderers can inflict Sprain.
- Because status ailments can be very bad, try to avoid getting hit as much as possible.
- Enemies can hurt each other with their attacks. The key exception is that Wanderer attacks will not harm other Wanderers.
- An attack by an enemy will force you to drop a POW/rescue target. This could lead to a mission fail if they kill your POW.
- Enemies can knock each other over with a sprinting punch, foot press, etc.
- Enemies that fall from a height or pierced by a spiked barricade will lose a % of health, regardless of your level.
- Similarly, explosive barrels ignore level, which can be used during Abandoned Mine.
- Damage to enemies is affected by level. The higher the enemy level is compared to you, the higher the damage penalty. Backstabs, grenades, falls, shotguns, piercings help negate this.
- The easiest method of backstabbing an enemy is to perform a running punch, enter walk mode by crouching or aiming, and then walking to their back while they are stunned. Be careful of knocking them to a wall or off a height if attempting to backstab.
- During digs, the minimap will help you judge enemy positions and provide situational awareness. Exploit this!
- Enemies killed during a defense will automatically provide Kuban energy. Enemies killed outside of digs require harvesting.
Wanderers (Zombies)
- Provide Kuban energy based off of level multiplied by 100. For example, a level 10 Wanderer provides 1000 energy.
- The most common enemy you will encounter, comes in a variety of outfits.
- By far the enemy most likely to kill you during the run.
- Wanderers can see and hear, though they aren't extremely perceptive. Crouch walking or a standing walk will be used to sneak when necessary.
- A Wanderer can notice Captain or a noise and go investigate. If they spot you, you will hear the alert noise and they will scream.
- Wanderers may sleep on the ground. If aggro'd, they will attempt to grab your ankles, forcing you to shake them off.
- In a base defense or dig, Wanderers will either be in walk mode or run mode. Walk mode means they will get distracted by crystals and lures. Run mode means they will ignore distractions.
- If near the defense target, they will run towards the target, ignoring lures and the Captain.
- They will destroy structures in their path, but they can slip by structures while attacking due to forward momentum from attacks.
- If the structure is a fence, they can cling to the fence to attack it. The more Wanderers on a fence, some will begin climbing over and bending the wall.
- When a wanderer is clinging to a fence, they ignore Captain until attacked. The same goes for them attacking the Digger. These make for easy backstab targets.
- Just like a stereotypical zombie, they are more dangerous in groups. Get swarmed by a group of Wanderers, and they will chain attack you to death very quickly.
- Wanderers have multiple attack and movement patterns during Combat in a standing position.
- Swing Combo - Wanderer will slowly swing one arm after each other, most common attack. Sometimes they won't finish the combo, but it's safer to assume they will swing twice. Be aware of the backswing hitting you when behind a Wanderer.
- Flailing Arms - Wanderer will swing their arms quickly with little windup. This attack doesn't have much forward momentum, so they do this in close quarters.
- Battle Cry Swing - Wanderer will yell to the sky and do a combo. This attack has decent forward momentum, so be careful! Be aware of the backswing hitting you when behind a Wanderer.
- Linebacker Tackle - Wanderer will crouch to the ground, charging a tackle. Depending on the distance between you and the wanderer, they may charge for a long period of time. Once unleashed, the wanderer homes onto Captain, potentially wrapping around structures and finishing with a dive. This charge potentially has a huge range, meaning you need to dive, combat step, or run away. If they connect, they grab Captain and require punches to remove. If the dive connects too late, it will instead deal damage as a Unicorn Horn Dive. This attack can catch you by surprise and lead to death, as you are helpless while other Wanderers swing at you.
- Grounded Swing - Wanderer on ground will swing arms, potentially grabbing ankles. Best way to avoid this is stand behind the Wanderer's legs. Can cause sprain.
- When aggro'd, they will run to Captain and potentially go into a battle stance, slowly circling.
- Critical damage is inflicted by attacking the wound in their back or the crystal on their head.
- Aiming for legs can cause Wanderers to fall over.
- Wanderers that destroy a fence will fall over if they were clinging, giving an easy opportunity to score hits.
Bombers (ZombieBom)
- Provide Kuban energy based off of level multiplied by 200. For example, a level 15 Bomber provides 3000 energy.
- Bombers are slow moving targets that have a large defensive shell.
- Bombers are vulnerable at their back and their legs.
- Bombers have multiple attacks from a standing position.
- Headbutt - Bomber will charge up a headbutt. This does massive damage to Captain and structures.
- Self-Destruct - Bomber will explode. They will do this if annoyed enough by headbutting, getting punched, getting kicked, or getting attacked. Otherwise, they will self-destruct at the digger or upon death if it's not a backstab. After 3 annoyances, they will charge up a self-destruct and explode after a few seconds. Get away from this explosion fast!
- Bombers can be backstabbed, which removes their ability to self-destruct. If a wanderer is in the process of self-destructing and is backstabbed before it occurs, the explosion will not happen.
- Chain attacks at their legs if you want them to explode. This explosion can clear a wave of Wanderers.
- As long as you kill the Bomber by destroying their legs, the explosion will give you Kuban energy from killing other units. If killed by annoyance, you will gain no energy.
Dogs
- Dogs are required enemies by Africa Transporters 02 and 06. They are also nearby container 06 and Afghanistan Transporter 07.
- When aggro'd, they can leap backwards.
- They attack by diving at the target, biting and stunning the target.
- The head is the weak point.
- Try not to fight dogs, run away from them. You may need to fight the dogs at Transporter 02.
Watchers (SirenCamera)
- Provide 300 Kuban energy.
- Flying bugs that guard Chris in Chapter 10.
- They fly slowly toward their target then fire small bullets.
- Their attacks don't do much damage.
- Shoot with the Machine Gun Turret, which can snipe them from afar.
Crawlers (Spiders)
- Provide 300 Kuban energy(?)
- Crawlers are only encountered at Ruins 02 in Chapter 11 in the pit before the memory board.
- As long as you walk and don't attack, they will ignore you in the pit.
- If you attack, they will swarm you and likely kill you. If you fall into the pit, do not fight!
Grabber (Mimic)
- Provide 300 Kuban energy(?)
- Grabbers are exclusive to Africa.
- Grabbers hide in the ground with their vinelike tentacles waving above.
- If Captain approaches too close, they will whip a tentacle to the ankle, forcing you to shake them off.
- The distance they can grab is pretty large (~6 ft or 2 m), so stay away!
- In combat, they will leap at you to attack.
- Ideally, you completely ignore all Grabbers or distract them with lures.
Mortars (ZombieShell)
- Provide Kuban energy based off of level multiplied by 200. For example, a level 15 Bomber provides 3000 energy.
- Mortars are exclusive to Africa.
- Mortars are encountered during Sally defense and Deserted Mine dig.
- Large Wanderers with a defensive arm that allows them to shoot a spread gun and launch explosive shells from a great distance.
- Unless stunned with a punch, they cannot be backstabbed.
- Mortars have multiple attacks from a standing position.
- Spread Gun - Fires multiple bullets in a spread in a vertical arc. These bullets cover great distance and deal decent damage. Can damage digger from afar.
- Mortar/Explosive Shell - Fires an explosive crystal from a great distance. After landing, they explode after a few seconds. Can be kicked away if at risk of damaging a defensive structure.
- Swing Combo - Similar to the Wanderer Combo, but their large frame means they have a larger range and distance covered.
- If ignored, they can potentially help by shooting and blowing up enemies. These deaths do not result in Kuban energy.
- A well placed shotgun blast to the back or head can kill. Grenades are an easy one shot from a distance.
Trackers (ZombieDash)
- Provide Kuban energy based off of level multiplied by 200. For example, a level 15 Bomber provides 3000 energy.
- Trackers are exclusive to Africa.
- Trackers are encountered during Wave 3 of Deserted Mine dig.
- Fast Wanderers that leap and dash around, difficult to hit with melee weapons.
- Trackers have multiple attack from a standing position.
- Leap - Jumps at target, which can be a large distance.
- Swing Combo - Similar to the Wanderer Combo.
- Ballerina Kick - Pirouettes towards target quickly and covering ~ 2m or 6 ft. Knocks you down on the floor.
- Use a RASP shell on the Tracker, attempting to use just melee is dangerous and too slow.
The Run
- Don't get injured! Maintain Distance!
- Don't run below 900 stamina!
- Replenish food/water at convenient times! Sometimes it is worthwhile to drink to lose time for the additional stamina, like rescuing Miranda.
- To quickly refill ammo and gear, select change equipment prompt, press shift or left stick to replenish.
- Stop sprinting just before you climb/go off a ledge/etc. to regain stamina, ready your weapon to do so.
- To skip tutorial text, mash spacebar or the mouse button while holding the other. This will confirm the last piece of text instantly. Credit to SpaceCow
- If you have an ailment or are injured, you can sleep 30 minutes in a shelter or tent to recover HP/Stamina, or 6 hours to remove all ailments. Good trick if drinking dirty water!
- Level up times:
- at Chapters 6/7 (before Ruins 01 or Digger) to level 5 or 6
- at Chapter 9 (before Wrecked Base) to level 8
- at Chapter 11 (before Chris) to level 10
- at Chapter 15-1 (before Africa Dig) to level 14
- at Chapter 16 to level 16
- at Chapter 20 (before Seth fight) to level 19
If you are not level 14 before the dig to Africa, the run is going to be very difficult due to a vicious cycle of being behind on experience.
Opening
- Time begins when skipping the final cutscene before gaining control.
- Stop running at the blue spot on the ground. Walk to the second shrub.
- When you are turning the corner with the window light, dive.
- Dive up the stairs to save time.
- Once you get past the corner, slide into the locked door.
- Pick up the rags and iron to the right side, and the materials to the left of the bench.
- Pick up wood from broken barriers after destroying.
- Uncrouch after diving into hole and skipping cutscene, run to door.
- Mash the interact button to open locks faster.
- Sprint punch the wanderer, attack the door while moving upleft
- When climbing stairs, ready the spear to climb them faster
- Dive under the pipes, hold the dive button for tutorial.
Chapter 1: Tutorial
- Run towards the pond. Either crouch at 900 and recover walk to run, or dive constantly until the iDroid prompt appears.
- Mash to skip tutorial when you open iDroid.
- Grab 3 clean water bottles and then kill 1 sheep for its meat. All other items can be picked up later for free. Drink all water immediately.
- If you have a 3 item harvest, you can cancel after the 2nd item.
- If you picked up a gerbil incidentally, you have enough time to roast it when returning to base while Vergil talks.
Chapter 2: First Memory Board
- Head up to build one iron fence.
- Run SW to the memory board. There are 4 wild berries by the pond and 2 crystals. These can be picked up in Chapter 8.
- Approach Wanderer on the left and punch it. Walk towards the corner on the right, then crouch walk to the door.
- Return to Base Camp via the pause menu after retrieving the memory board.
- Do not interact with Virgil UNTIL the tutorial is finished. You can prebuffer the action prompt.
Chapter 3: Three Memory Boards
- Go to Constructor and Deconstruct all Iron Debris in the Area. You gain 93 Iron and 29 Screws for around 18 seconds of timeloss.
- You can also upgrade your spear fully at this point if you picked up both sets of rags. Otherwise opt to do this at the first base dig.
- Head North/Hold Upright to go towards the first Memory Board.
- Pick up 5 carrots here, the 6th along the cliff wall is picked up on the way out.
- Pick up 1 Golden Crescent, 1 carrot here and 1 chair outside of the Air Tank Hunt.
- Try not to look at the Kuban Crystal as you enter the hut, or else the HUD can prioritize that over the air tank. Alternatively, break crystal for 1000 Kuban.
- Grab the carrot we left behind on the way out, then a Golden Crescent along the cliffwall by trees as we head to the 2nd Memory Board.
- Run around the right side of the broken truck rather than left, seems to be more consistent with crowd RNG.
- Kill the wanderers on the roof, unless playing risky with alert. Don't run to the memory board.
- While on roof, access damaged materials box for both materials. They are needed for the Wormhole extractor.
- Grab everything in the roof hut, you only need one stainless steel at the Pile of Goods.

- 2 carrots can be found by this rock, run down the hill to get another carrot and golden crescent.
- After returning to Virgil, build 6 fence.
- Build the wormhole extractor THEN the Air Tank, or you will get an additional tutorial.
- After jumping through the window, you do not need to move to interact with the memory board.
- To the right of the window is medical supplies that you can pick up.
- Return to Base Camp via the pause menu after retrieving the third memory board.
Chapter 4: First Transporter
- Head South/Hold Down during fadein
- 4 Berries can be found by the pond
- 1 Golden Crescent can be found by the trees along the cliff wall before the wall of dust
- There's a 1k Kuban Crystal on the cliff before defenses
Transporter First Defense Schedule
- START - Eat carrots to 100% hunger, ignore first enemy, break boxes for wood and nails, grab bucket, grab bullet materials behind hut, open crate and its items for medspray recipe, grab rags, copper, gunpowder, copper, and lead in hut.
- 1:23 - Return to front as the first enemy of big group shows up. Build an iron fence to block entrance, slightly offset so you can attack from side to skewer all.
- 1:15 - Crowd arrives at front, defend yourself! Back up and place another fence if needed.
- 0:30 - Back enemies arrive, jump in open air shed, pick up water and other materials inside. Fight them in the hut with the window blocking you. Pick up gunny sack and wood outside if possible.
- 0:05 - Place your lost box slightly down the hill for Miranda chapter, drink a bottle of water to max out your stamina
- 0:00 Return to Base Camp via the pause menu after the counter goes to 0. This skips a cutscene.
Chapter 5: Miranda Rescue
If playing safe, leveling DEX and END before rescuing Miranda may help
- Hold down during fadein
- Run SE to the Jeep from the Transporter.
- Make a left and drive down the road, either cutting forward then left, or making a left onto road then a right onto the next road.
- At this rock, hit the brakes and make a sharp turn into Ruins 01.
- Safety strategy for picking up Miranda is throwing a lure onto once side and then picking up Miranda.
- Otherwise, make a sharp left, drive into the pit and get out immediately.
- Make sure to have maximum Stamina when running with Miranda, as stamina decreases very quickly when carrying a POW in the dust.
- Drop to side of rock and run to door and open it.
- Carry Miranda past the fridge, grabbing the empty bottle. Climb the hill and activate the Transporter.
Miranda Rescue Schedule
- START - Drop Miranda at Transporter, run to Machine Gun Turret overlooking the ledge.
- 0:40 - Spin Turret back to Transporter to shoot enemies attacking Miranda. She can take some hits, don't worry!
- 0:30 - Get off turret, enter hut by fence opening. Pick up TNTx2, Steel and Rag. Go to fridge and pick up 3 potatoes. Then either enter nearby hut for Lead, Copper and TNT OR Gunny Sackx2 and Bucket.
- 0:10 - Head back up to Transporter, either climbing the cliff at 0 or standing by the crate to the left.
- 0:00 - Pick up Miranda and return to Base.
Chapter 6: Ruins 01
- Go to Miranda Transporter
- As you approach the Ruins 01, you either head right to pick up crystals, or head left to skip on them.
- There are 5 crystals near the tank, which takes about 20 seconds to pick up.
- Put Fence as close as possible to the tank to climb onto it.
- Once you enter Ruins 01, grab a water bottle on the table and drink if needed.
- Drop down the ladder, when getting near the staircase begin crouch walking.
- When the bomber is visible, toss it on the floor to distract the Bomber.
- Backstab the bomber while crouch walking, then unlock the door.
- Return to Base Camp via the pause menu after retrieving the memory board.
Chapter 7: Digger Retrieval
- Go to First Transporter
- Run to the Jeep, and take one of two paths
- If you want to be safe and pick up the Survival Spear, make a right and follow straight into the clean air. Open up the crate for the Survival Spear. Then you will drive along the fence to the left side of the entrance to pick up the iron.
- If you want to be fast, drive diagonally towards the concrete barriers, weaving around the tree to the right.
- You can drive through the barriers without losing speed, but it is very precise.
- Drive to the left side and pick up the iron blocking your way.
- Return to Base Camp via the pause menu after retrieving the Digger.
- If you want to play it safe, you can use the Jeep to fight here and use the transporter to gain XP. This is not required and loses around 1:30. You cannot let the Jeep get destroyed!
- Don't mash escape for the Digger cutscene at base, or you can open the menu. Wait until you see the digger.
Chapter 8: Base Camp Dig
Base Dig 1 Schedule
- For all Digs, try to maximize your kills and minimize the damage to the Digger. Whenever a quarter is removed from the digger, is destroys all nearby Wanderers, netting you no Kuban energy.
- You should be able to kill all enemies during this Dig!
- START - Run South towards the first Memory Board to pick up 4 Wildberries and 2 Crystals. Manufacture Iron Fences x12, Wood Fences x6, Lures x2, head to WEapons Bench and craft Rusty Machete, customize both Machete and Spear to 5. Remember, your Machete should be used for destruction and easy cleanup of enemies.
- 6:00 - Head south to begin fighting the Wanderers. Use fences when they begin piling together. After defeating all enemies, head west.
- 4:25 - 1st Enemy group spawns to the West. Pick up leftovers at the pond from Chapter 01, take dirty water from pond. By the time you are done, go backstab the Bomber and approach the front of the crowd to defend.
- 3:03 - 1st Enemy group spawns to the East. Don't go over there unless you have cleared all enemies to the West. Eastern Wanderers have a long trek to base.
- 2:11 - 2nd Enemy group spawns to the East. Ignore them.
- 2:00 - 2nd Enemy group spawns to the West. They are your primary focus after defeating the 1st East wave.
- 1:24 - 3rd Enemy group spawns to the West and East. Stay put at your digger and defend!
- END - After defeating all enemies, repair your pipe spear and restore your fences to full if you have the time.
Chapter 9: Wrecked Base Dig
- Manufacture Shelter and Campfire/Hanging Pot
- Level up to 8
- There are two tutorial pages when you approach the Dig Site.
- Don't forget, you need to place the digger AND activate it.
Wrecked Base Schedule
WAVE 1 - has the high level enemies hanging around the Wrecked base, so be careful!
- START - Defend your digger by backstabbing the enemy at the fence and harvest, then the single enemy by the digger.
- 1:00 - Enemies begin showing up at the Barricade to the NW. You can build an iron fence on the other side of the barricade offset to allow parallel skewers.
- 0:35 - Enemies begin showing up at the digger from the SE. Focus more on crowd control than trying to fight all the enemies, as it's a messy scattered wave.
- 0:22 - Enemies begin showing up at the digger from NE. Focus more on crowd control than trying to fight all the enemies, as it's a messy scattered wave.
- 0:00 Dive to dodge explosion if near digger. Head NE to break down pile of boxes at the shelter.
INTERMISSION 1
- Break down pile of boxes at the shelter.
- Can drop a fence for the NE line to block as you cross by.
- Head SE to the far spawn point, where the first group of wave 2 spawns.
WAVE 2
- 2:57 - 1st Enemy group to SE begins spawning, ideally stab them as they land.
- 2:37 - 1st Enemy group to NE begins spawning, finish off SE
- 1:50 - Without defense, NE group breaches the base.
- 1:36 - 1st Enemy group to SW begins spawning.
- 1:27 - 2nd Enemy group to SE begins spawning.
- 1:22 - 2nd Enemy group to NE begins spawning.
- 1:00 - Without defense, SW group breaches the base.
- 0:00 Head back SE.
INTERMISSION 2
- In SE break boxes or barrels, head N to grab 4 carrots in the fields. Eat!
- Return to base and begin looting the building for aluminum, bullet materials, clean water
WAVE 3
- 3:55 - 1st Enemy group to N begins spawning.
- 3:37 - 1st Enemy groups to NW and NE begin spawning.
- 3:20 - 2nd Enemy group to NE begins spawning.
- 3:13 - Without defense, breaches from NW and NE.
- 2:06 - 1st Enemy group to SE begins spawning.
- 1:40 - Without defense, SE group breaches the base.
- 1:37 - 2nd Enemy group to N and 3rd Enemy group to NE begin spawning.
- 1:32 - 2nd Enemy group to NW begins spawning.
- 1:14 - After addressing SE group, backstab the bomber.
- 0:30 - Finish your looting, do some crowd control if necessary due to Digger's HP.
- END - When base is safe, begin heading E to the road to drop off Lost Box for Chapter 10.
*Return to Base Camp via the pause menu after the counter goes to 0 on the final wave.
Chapter 10: Chris Rescue
Before going into the transporter, level to 10/max level
- Go to the Jeep, drive to the Walker Gear. Drive straight through the alley to the east, then turn southeast at the final barricade wall to drive along the road.
- Use the Walker Gear to follow the Road with the Wanderers.
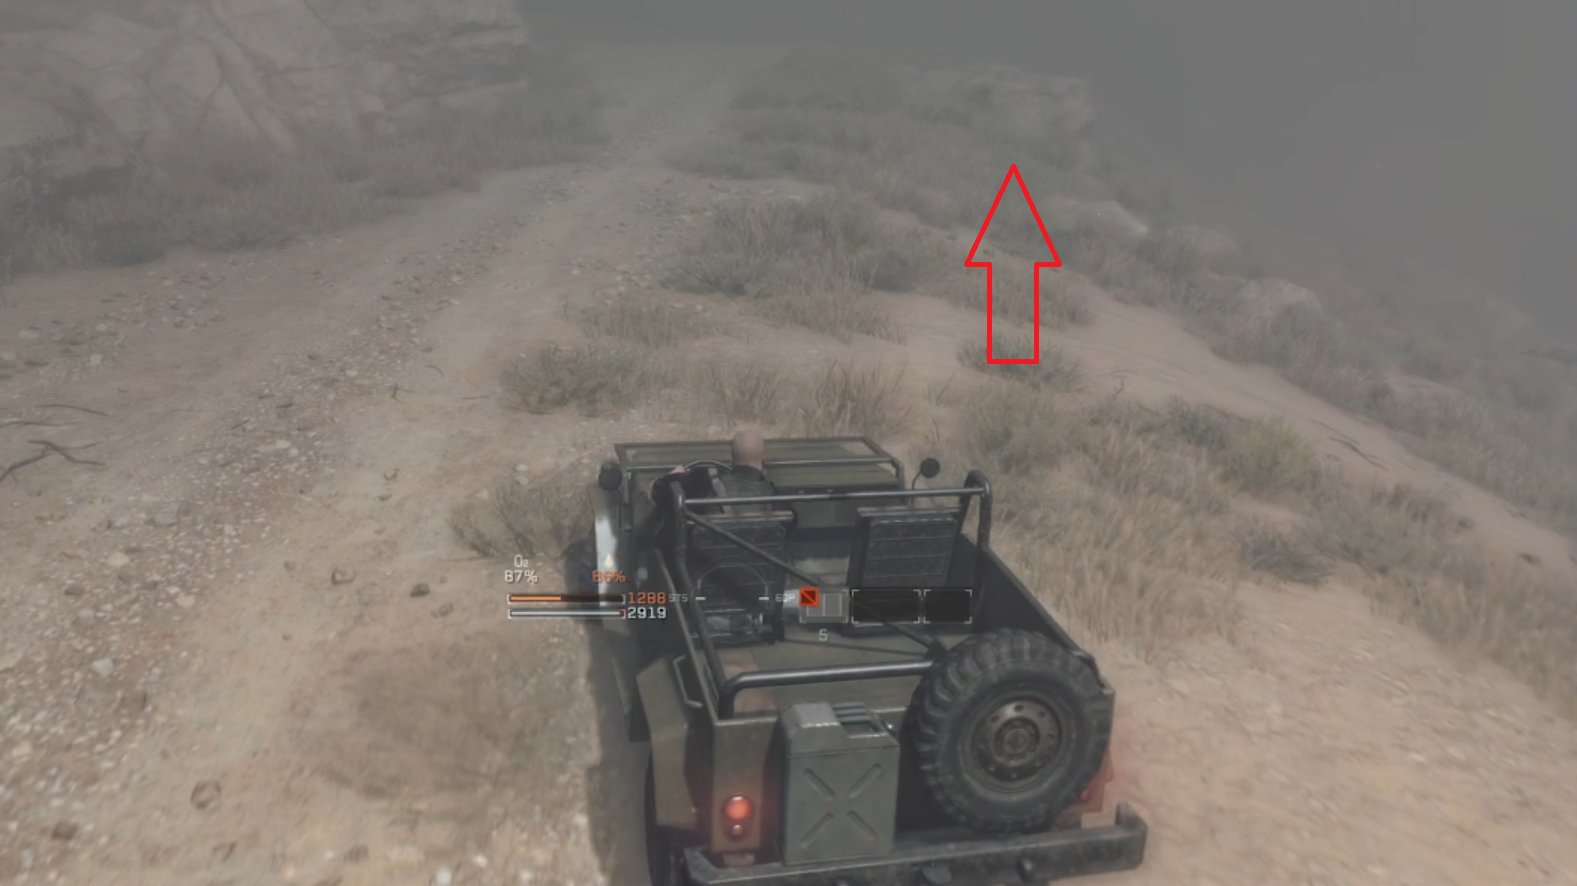
- You can scale the hill with the Walker Gear to Chris.
- Follow the right edge of the cliff towards the transporter. Take care not to get grabbed.
- Defend with the Machine Gun
Chapter 11: Ruins 02
- Transport to Chris Transporter
- If the Lord of Dust shows up, make sure to time crossing so you don't get stopped. OR, dive when the foot lands.
- Be weary of the wanderer by the wheelchair, if he is too close to the wheelchair, take him out.
- You can jump onto the platforms instead of grabbing the ledge, but it is precise.
- Return to Base Camp via the pause menu after retrieving the memory board.
- Swap to controller when you get back to base, you need to place the Exploration Team Ready Room.
Chapter 12: Nicholas Rescue
- WARNING: Above video does not show the fence route detailed below.
—-
- Updated route video
- It is easy to get lost going to Nick, pay attention to landmarks (the arch, the fort, the tree, the wall, the hut, etc.)
- Run through the Town, to the corn field.
- Climb the rock at the wall by the cornfield, place a fence along the wall to climb the cliff.
- Careful when running through the crowd of wanderers to the Transporter, a mistake here could cause a game over.
- You can go to the right or left to the Transporter, there is no difference in time.
- Drop Nick quickly and safely!
- Drop down fences around the Transporter
- Wait behind the building's corner before the explosion
Chapter 13: Fallen Village Dig
- Return to Base Camp via the pause menu after the counter goes to 0 on the final wave.
Chapter 14: Base Camp Expansion
- If you are on PC, switch to controller after you skip the cutscenes.
Before building the expansion, Level to 15
- Destroy all remaining rubble before building the expansion
Chapter 15-1: Africa Dig
Now that you are level 15, you gain more survival equipment slots. Redo your loadout
- You'll need the iron watchtower later for Ruins 03.
- Double check that your air tank didn't get unequipped while you wait around
- Africa is a chokepoint in the run, as Chapter 16 and 17 require stealth to go fast.
Chapter 15-2: Climb the Platform
- Wait for the Lord of Dust's hand on the bridge before going by. Once you see the Lord's hand start going back, you can move past it.
Chapter 16: Africa FOB
- Hold down during fadein
- Make sure to kill the grabber outside the tunnel
- Hug the tree to avoid the second grabber
- Angle and timing of the lure bottle is pretty important
- Wanderers in the back may path unpredictably to the Lure, be ready to kill them with the silenced pistol if necessary.
- Return to Base Camp via the pause menu after retrieving the memory board.
Chapter 17: Seth Rescue
- Hold down during fadein
- Be aware that the Wanderers on the cliff could be in various positions. Be alert!
- Hold R after the Seth cutscene to pick him up immediately.
- Run down the slope, dropping down at the edge closest to the bridge. Go across to the left side of the bridge. Drop down.
Chapter 18: Investigate Sahelanthropus
- Just hold spacebar, you are already on the transporter.
- Approach the ledge so you slide down. Alternatively, you can dive at just the last moment.
- The Walker Gear is at the tent on the right after you enter the dust
- After the Dan Codec, hold down to head towards the transporter.
- Return to Base Camp via the pause menu after the counter goes to 0.
Chapter 19: Secure Sahelanthropus
SAVE THE GOATS IN THIS THRILLING 15 MIN DEFENSE!
- There are two codecs when you return to the FOB
- After securing Sahelanthropus and the codec, Return to Base Camp via the pause menu
Chapter 20: Wanderer Seth
Level up to 20 before fighting Seth
- Shoot him in the face
- Three shotgun blasts should take him out
- This fight shouldn't take more than 10 seconds
Chapter 21: Ruins 03
UPDATED START OF MOVEMENT SHOWN HERE
- You can use an iron watchtower to save a couple seconds when climbing the final wall over the crack, but it requires quick placement.
- Remember, you need an iron watchtower to perform the shortcut.
- Wanderer position in Ruins 03 doesn't seem set.
- Return to Base Camp via the pause menu after retrieving the memory board.
Chapter 22: Deserted Mine Dig
- Hold left during fadein
- Hold upright after transporter
Deserted Mine Schedule
WAVE 1 - Look out for the Mortar on top of the boat!
- START - Defend your digger by backstabbing the enemy around. Head up to the boat and shoot or otherwise defeat the mortar.
- 3:27 - 1st Enemy group to SW begins spawning.
- 3:12 - 1st Enemy group to SE begins spawning.
- 2:32 - 1st Enemy group to NW begins spawning.
- 2:19 - 1st Enemy group to W begins spawning.
- 2:12 - 2nd Enemy group to NW begins spawning.
- 1:33 - 2nd Enemy group to SW begins spawning.
- 1:27 - 2nd Enemy group to SE begins spawning.
- 1:12 - 2nd Enemy group to W begins spawning.
- 0:58 - 3rd Enemy group to NW begins spawning.
- 0:32 - 3rd Enemy group to SE begins spawning, they will not arrive to the digger on time to attack.
- 0:00 Dive to dodge explosion if near digger. Head NE to break down pile of boxes at the shelter.
INTERMISSION 1
- Regen your Oxygen while waiting
- Head up the hill to the north.
WAVE 2
- 3:27 - 1st
- 2:37 -
- 1:50 -
- 1:36 -
- 1:27 -
- 1:22 -
- 1:00 -
- 0:00
INTERMISSION 2
WAVE 3
- 3:55 -
- END -
Chapter 23: Archaea Blade Trap
- Go to the Build Computer, construct the Archaea Blade Trap
- Go to Digger to initiate Chapter 24
Chapter 24: Lord of Dust
- For Bad Ending, hold down to head to the wormhole. Hold spacebar. GG
- Descending the Platform
- You can use a revival pill in case you die from falling
- Lures and Grenades are OP for Wave 1 and 3
- MG Autoturrets are useful for the final waves.
- Be at the leftside of Sahelanthropus's head